
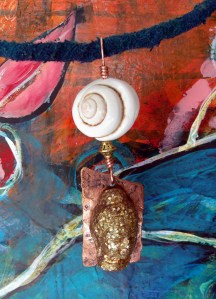
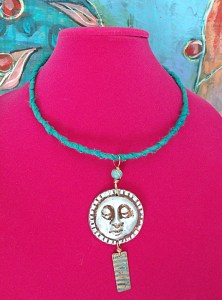
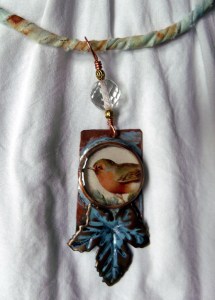
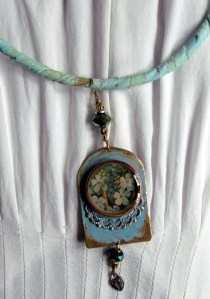
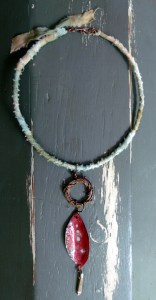
Just a little peek at what I’ve been working on – mixed media necklaces on hand dyed silk, cotton and linen wrapped wire– super comfy and unique. Featuring resin, copper, brass, beads, shells and charms. Available at Shooting Star Gallery very soon.
Tag Archives: jewelry


2015 class schedule
Street Style Graffiti Journal
Sunday, April 26, 2015, 1-4 pm
for the Suffolk Art League
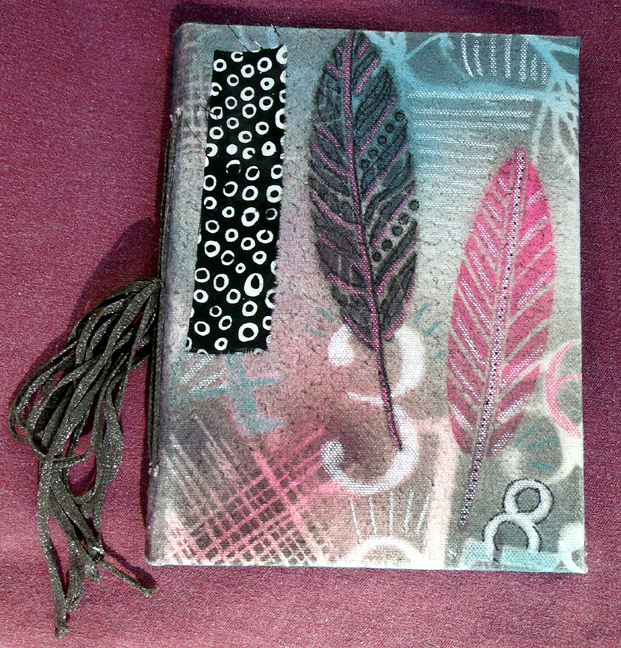
Calling all Poets, Writers, Artists and Journalers! Looking for the perfect journal to hold your most creative thoughts? Each student will make a unique, bold and colorful 6” x 8” journal perfect for sketching, art journaling or writing. We will use heavy paper for pages, stencils and spray paint for street style images throughout, canvas for covers and fibers for texture.
Most supplies included. Students should bring basic tools including scissors, pencil and ruler. A bone folder or spoon will be helpful for folding pages. If you have stray spray paints (any color), please consider donating them to the class. If you are sensitive to paint fumes, bring a mask. We will be painting outside, rain or shine. Please wear old shoes
Suffolk Art League is located in the Suffolk Art Gallery at 118 Bosley Ave. in Suffolk, Va. — 757-925-0448
Beginner’s Torch Soldering: Beautiful Bezels
Sunday, May 3, 2015, 1-4 pm
at the Suffolk Art Gallery
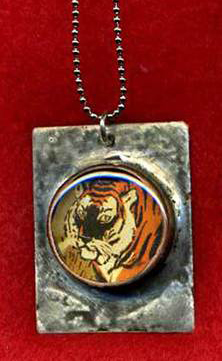
Learn the basics of torch soldering, cutting, filing and hammering copper to make beautiful round bezels that perfectly showcase your photos or artwork! Accessible materials and a simple process will make for sure-fire success! Fill them with resin to form a glass-like bubble for beautiful, personalized pendants to wear or give.
Students must bring: a butane torch, 1 full can of butane, tin snips, needle nose pliers, scissors, safety glasses, a cookie sheet and a fire brick or yard brick. Wearing safety glasses is mandatory. Optional: small images about 1” in size. Photos or sized down versions of your artwork work well.
Note: *All measures will be taken to create adequate ventilation as much as possible. If you have extreme sensitivities to soldering products or smelly stuff, consider this carefully before registering.
Suffolk Art Gallery is located at 118 Bosley Ave. in Suffolk, Va. — 757-514-7284
 Art, Soul and Blues: Altered and Embellished Denim Jacket
Sunday, Oct. 4, 2015, 9am-4:30pm
at Art & Soul Retreat, Virginia Beach

You are an artist and you have something to say… now you can wear your art on your sleeve and show the world your vision. Mixed media embellishment is the perfect accompaniment to denim. Make a tattoo-inspired vest, a rock ‘n’ roll style jacket, or a unique boho-styled shirt — your choice. Design, cut, patch, embellish, embroider and more to take your wearable item from ‘Plain Jane’ to Rock Star! Your unique finished creation will remain soft, comfy, wearable, washable and extremely cool.
Art & Soul Retreat, 2800 Shore Drive, Virginia Beach, Va. — Artandsoulretreat.com
new jewelry
Winter is a fabulous time to hunker down and make some jewelry! As soon as the snow lets up, I will drop off my new pieces at Shooting Star Gallery in downtown Suffolk, Va. I’ve worked up a lot of different styles, focusing on texture and color with lots of copper, silk fibers and sparkle. Here is a preview… I hope you enjoy them.
TAP dancing!
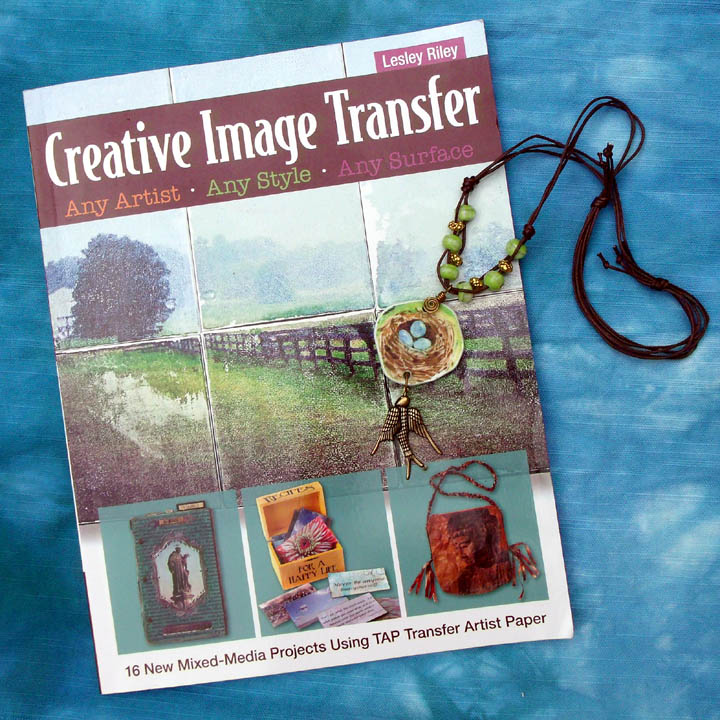
CREATIVE IMAGE TRANSFER– Any Artist, Any Style, Any Surface
by Lesley Riley
Creative Image Transfer is finally available and I am so excited to be a part of it! The book includes 16 new mixed-media projects using TAP Transfer Artist Paper. My project uses TAP on Faux Bone – a non-toxic, flat PVC plastic that can be cut and carved into any shape for beautiful, lightweight jewelry components. The book showcases 5 of my Faux Bone necklaces, each with a TAP transfer of my artwork.
To celebrate the event, Lesley is having a Creative Image Transfer book and TAP Give-away! Just head over to her blog anytime from Aug. 6-10, 2014 and enter to win!
crochet necklace tutorial
CROCHET NECKLACE TUTORIAL –
In the summer I look for portable art projects so that everything I need fits in my beach bag. I usually turn to jewelry crafts in colors to match the sand and sea.
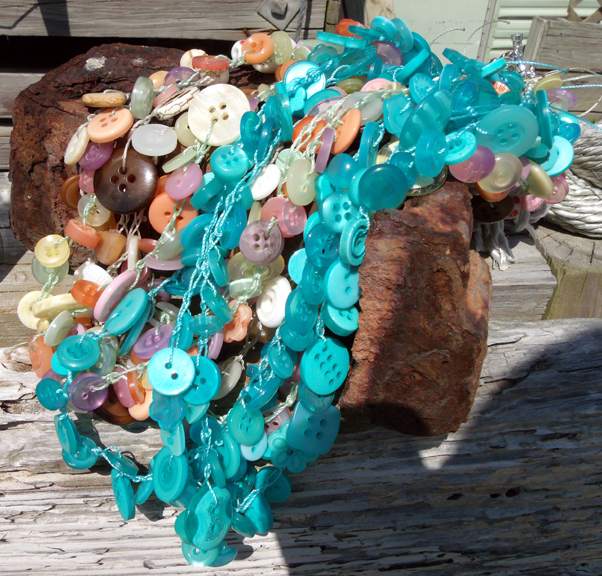
This crochet beading project fits the bill perfectly—it is relaxing to work on and when finished, it looks great with your bathing suit. It is super easy so you can whip up a bunch for presents while you are hanging out on vacation. No need to buy a ton of supplies – you can use up assorted beads and buttons that you have on hand. The more you mix em up, the more interesting the finished necklace will look.
Materials
Assorted buttons, beads and charms
Small crochet hook
Nylon thread ( I used C-Lon Beading/Macrame cord)
2×2 crimp beads
Crimp pliers or flat nose pliers
Toggle
Scissors or nail clippers
Instructions
For a 22-24” necklace, begin by loading about 60 beads, buttons and charms onto your nylon thread. Do not cut the thread to size—leave it on the spool. The bulky end of the spool acts as a stopper so your beads do not fly off the other end. This makes it really portable, and you never run out of thread before your project is finished. No measuring necessary! Tie a slip knot at the loose end of your thread, load it into a Ziploc bag with your crochet hook and clippers and head to the beach.
To give your necklace a nice strong base, do about 5 single crochet stitches to start. Pull your first bead/button down to your stitching and then do 2 or 3 crochet stitches by reaching past the bead/button with your hook. Don’t worry if the stitches are loose – they are supposed to be. Pull down your next bead and repeat. 2 stitches in between each bauble makes for a tighter bundled finished piece, 3 makes it a bit looser. Experiment to see what you like better. In the photographed examples I used 3 stitches in between for the neutral necklaces, and 2 for the others.
Continue crocheting stitches and pushing down beads until you are satisfied with the length. I hold it up to my neck to measure so I don’t have to bring a ruler. It’s okay if you did not use up all the beads on your string. Do 5 stitches to end the piece, snip your thread to about 2″ long and pull the end thru the loop to make a knot. Hold one end in each hand and pull gently to tighten everything up.
Put a 2×2 crimp bead on one end of your necklace, snuggling it down to your 5-stitch base. Run the thread thru the ring on one side of your toggle and then back thru the crimp bead. You can use a crimp tool to professionally flatten the crip, or just flatten with flat nose pliers. Attach the other end of your necklace to the other toggle piece in the same manner. Trim your loose end threads to about an inch long and singe slightly with a lighter to prevent fraying. Crimping works better with the nylon thread because knots tend to slip. Cotton or waxed linen thread is suitable too, but not as durable.
If you want a 3 strand necklace like the examples shown, just repeat the process two more times and attach each strand to the same toggle.
