CROCHET NECKLACE TUTORIAL –
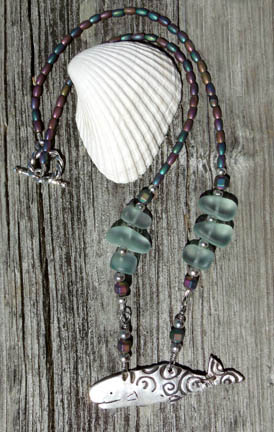
In the summer I look for portable art projects so that everything I need fits in my beach bag. I usually turn to jewelry crafts in colors to match the sand and sea.

This crochet beading project fits the bill perfectly—it is relaxing to work on and when finished, it looks great with your bathing suit. It is super easy so you can whip up a bunch for presents while you are hanging out on vacation. No need to buy a ton of supplies – you can use up assorted beads and buttons that you have on hand. The more you mix em up, the more interesting the finished necklace will look.
Materials
Assorted buttons, beads and charms
Small crochet hook
Nylon thread ( I used C-Lon Beading/Macrame cord)
2×2 crimp beads
Crimp pliers or flat nose pliers
Toggle
Scissors or nail clippers
Instructions
For a 22-24” necklace, begin by loading about 60 beads, buttons and charms onto your nylon thread. Do not cut the thread to size—leave it on the spool. The bulky end of the spool acts as a stopper so your beads do not fly off the other end. This makes it really portable, and you never run out of thread before your project is finished. No measuring necessary! Tie a slip knot at the loose end of your thread, load it into a Ziploc bag with your crochet hook and clippers and head to the beach.
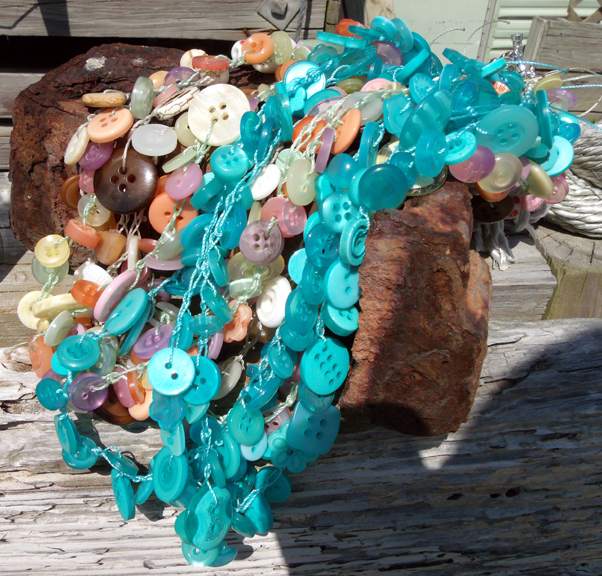
To give your necklace a nice strong base, do about 5 single crochet stitches to start. Pull your first bead/button down to your stitching and then do 2 or 3 crochet stitches by reaching past the bead/button with your hook. Don’t worry if the stitches are loose – they are supposed to be. Pull down your next bead and repeat. 2 stitches in between each bauble makes for a tighter bundled finished piece, 3 makes it a bit looser. Experiment to see what you like better. In the photographed examples I used 3 stitches in between for the neutral necklaces, and 2 for the others.
Continue crocheting stitches and pushing down beads until you are satisfied with the length. I hold it up to my neck to measure so I don’t have to bring a ruler. It’s okay if you did not use up all the beads on your string. Do 5 stitches to end the piece, snip your thread to about 2″ long and pull the end thru the loop to make a knot. Hold one end in each hand and pull gently to tighten everything up.
Put a 2×2 crimp bead on one end of your necklace, snuggling it down to your 5-stitch base. Run the thread thru the ring on one side of your toggle and then back thru the crimp bead. You can use a crimp tool to professionally flatten the crip, or just flatten with flat nose pliers. Attach the other end of your necklace to the other toggle piece in the same manner. Trim your loose end threads to about an inch long and singe slightly with a lighter to prevent fraying. Crimping works better with the nylon thread because knots tend to slip. Cotton or waxed linen thread is suitable too, but not as durable.
If you want a 3 strand necklace like the examples shown, just repeat the process two more times and attach each strand to the same toggle.
This slideshow requires JavaScript.