life on a sandbar

Outer Banks, NC

GEDSC DIGITAL CAMERA

Our trailer has been on this little plot of sand for over 30 years. In the late 70’s my husband’s parents put it there… and there it sits – in the middle of a campground full of colorful characters. Surfers, fishermen, teachers, beach lovers of all ages – some with families of small children, some retired… a few live here year round.

Each year the cast of characters changes a bit – some move in and some move out. They come for the beach, the surf, the fishing or the fabulous sunsets. Each one is as different as the next… all interesting in their own way – each one with a story to tell. Every summer they converge here and for the most part they manage to get along on this little stretch of beach with little rectangular trailer homes stacked in side by side. The kids all play together in the ocean and all the adults keep an eye out. On holidays we have a pig pickin’ and celebrate life’s blessings.

Sometimes a storm will wreak havoc and sometimes the bridge is out, but we keep coming back and celebrating life on a sandbar.


oh so close to greatness…

Chrysler Museum
Norfolk, Va

GEDSC DIGITAL CAMERAIt’s mind-boggling really… just how close you can get to greatness at the Chrysler Museum in Norfolk. Cassatt, Renoir, Gauguin, Warhol, all on display. No ropes or barriers — nothing to keep you from standing right where THEY were standing when THEY were creating their great works.

I stood mesmerized… breathing the same air, seeing the same brushstrokes, feeling the same awe as the artist must have felt as the work emerged from a blank canvas. It is hard to catch your breath when you see Cassatt’s beautiful, chubby baby in “The Family” or back away slowly from Paul Signac’s, “The Lagoon of Saint Mark, Venice” and watch as millions of colorful marks turn from chaos to masterpiece before your eyes.

We went to the Chrysler for Father’s Day. First a picnic on the grounds under an amazing tree. Then a tour of the newly renovated museum. A fabulous day with my parents, my sister, my brother-in-law and the many artists whose works grace these halls.


blog tour monday

I’m so excited that Jeannine asked me to play this artful Monday Blog Tour! She is my blogging mentor and a fab friend! Thanks for tuning in!

duck selfieswhat am i working on?

At my job in Graphic Design, I usually build a lot of ads and put out a lot of fires, but lately I have been working on some really cool stuff…

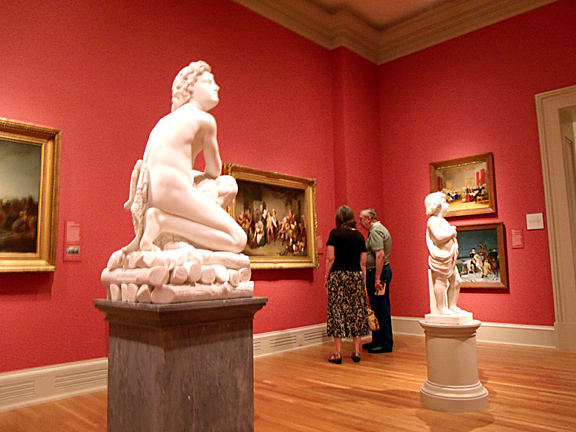
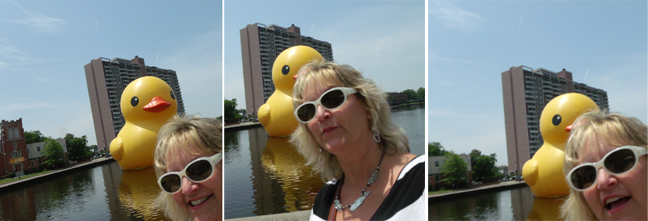
I got to attend a Designer field trip to see the giant rubber ducky at the Grand Re-Opening of the Chrysler Museum in Norfolk. I had some folks tell me they just didn’t get what the big deal was about, but that was one seriously BIG ducky! You could feel the excitement everywhere. It was a buzz – a super happy yellow sunshiny buzz. Duck lip selfies were mandatory. And the Chrysler Museum looks awesome! I’m planning another trip there soon.

I got to be a part of the new Outer Banks Magazine! Along with building some ads for the product, I was invited to come down to Nags Head for the fashion/cover photo shoot. I got to see how the stylist works with the models, the photographer and the lighting. It was amazing to see the transformation to the finished product.

I was also fortunate to be able to put on a training class for the Design team. The theme of the training was something I am very passionate about – lifelong learning! I made them all “Thinking Caps” to remind them to keep their MINDS WIDE OPEN! It was really rewarding to see a bunch of super busy folks wearing silly hats, taking notes and getting excited about learning something new!

jeans stripe

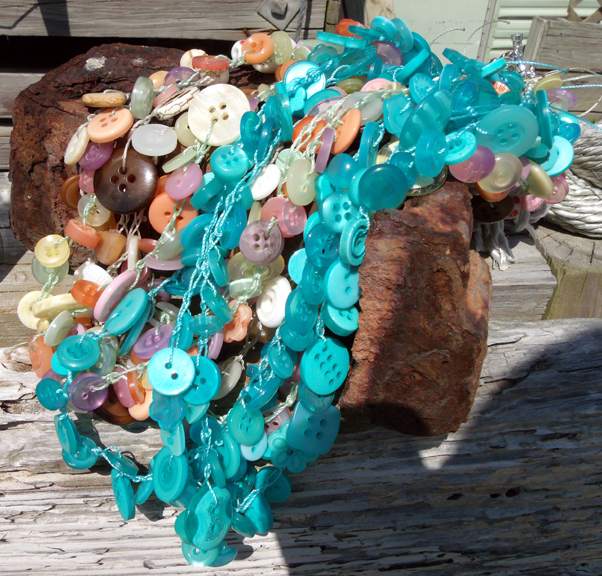
In my home studio, I paint, do mixed media and make jewelry. I also teach classes. Right now I am working on samples for my Hippy Hippy Shake Altered Jeans class for Art & Soul Virginia.  The jeans are addictive to make, and the more you add to them the more fun they are to wear. Layers and layers of color, fabric, and embroidery… party pants!

how does my work differ from others of its genre?

I love bright colors and i try to throw a little humor into each piece – even my jewelry is not  too serious. I try to produce art that pleases me, and I don’t worry too much about what other people will think of it. If it sells, that’s great. If not, no worries.

why do I write/create what I do?

I do it because it’s fun and I enjoy it, and it keeps me out of trouble. I’m a little hyper and
I’m better off if I keep my hands busy.

how does your writing/creative process work? 

I’ve found that the important part is to show up. It is pretty easy to get sucked into the computer (who is not hooked on Pinterest?? so many pretty pictures!!) or TV or cleaning the house. I have to make time to make art! So I punt the rest, and head up to my studio. I start by picking up stray supplies and putting them away and before you know it, I am spreading paint on a canvas or making a dozen pairs of earrings. I leave the projects out so that If I have 15 extra minutes I can head up there and play with them. I work full time outside the studio, so it makes me feel better to be able to sit down and add a little dab of paint during the week. Then on the weekends I can really dig in.

That’s enough about me! Now I’d like to introduce you to 2 of my art buddies. They are uber talented and full of creative energy! I am sure you will enjoy your visit with them!

Jenni Horne  is an artist and teacher living in the suburbs of Atlanta, Georgia. Her work can be described as whimsically folksy and charming in nature with an innocence that reminds people that life is supposed to be lovely, simple and inviting. Through her art she loves to tell stories about ordinary living with honesty and wit reminiscent of lazy southern summer days with sweet tea and neighborhood kick ball. Although Jenni received her BFA from Auburn University, she credits the majority of her learning from her creative art students spanning her 17 year career as an art teacher. She is married to her college sweetheart Billy who balances her creative whims, and they are raising two teenagers and a small petting zoo. Join her first e-course this summer at www.paintsomething.guru

Cathy Mendola is an east coast girl that has been transplanted in the midwest and has finally come to terms with the brutal winters. She is a dabbler of many mediums but has a current obsession with beading. Whether it’s making jewelry or creating bead embroidered projects she can’t get enough of it. She is also mildy obsessed with wool & silk fibers and the wonderful combination the two can create through wet felting or needle felting. Come to think of it, there’s not much she doesn’t become obsessed with once she plays with it the first time!

crochet necklace tutorial

CROCHET NECKLACE TUTORIAL –


In the summer I look for portable art projects so that everything I need fits in my beach bag. I usually turn to jewelry crafts in colors to match the sand and sea.

This crochet beading project fits the bill perfectly—it is relaxing to work on and when finished, it looks great with your bathing suit. It is super easy so you can whip up a bunch for presents while you are hanging out on vacation. No need to buy a ton of supplies – you can use up assorted beads and buttons that you have on hand. The more you mix em up, the more interesting the finished necklace will look.

Materials
Assorted buttons, beads and charms
Small crochet hook
Nylon thread ( I used C-Lon Beading/Macrame cord)
2×2 crimp beads
Crimp pliers or flat nose pliers
Toggle
Scissors or nail clippers

Instructions

For a 22-24” necklace, begin by loading about 60 beads, buttons and charms onto your nylon thread. Do not cut the thread to size—leave it on the spool. The bulky end of the spool acts as a stopper so your beads do not fly off the other end. This makes it really portable, and you never run out of thread before your project is finished. No measuring necessary! Tie a slip knot at the loose end of your thread, load it into a Ziploc bag with your crochet hook and clippers and head to the beach.

To give your necklace a nice strong base, do about 5 single crochet stitches to start. Pull your first bead/button down to your stitching and then do 2 or 3 crochet stitches by reaching past the bead/button with your hook. Don’t worry if the stitches are loose – they are supposed to be.  Pull down your next bead and repeat. 2 stitches in between each bauble makes for a tighter bundled finished piece, 3 makes it a bit looser. Experiment to see what you like better. In the photographed examples I used 3 stitches in between for the neutral necklaces, and 2 for the others.

Continue crocheting stitches and pushing down beads until you are satisfied with the length. I hold it up to my neck to measure so I don’t have to bring a ruler. It’s okay if you did not use up all the beads on your string. Do 5 stitches to end the piece, snip your thread to about 2″ long and pull the end thru the loop to make a knot. Hold one end in each hand and pull gently to tighten everything up.

Put a 2×2 crimp bead on one end of your necklace, snuggling it down to your 5-stitch base. Run the thread thru the ring on one side of your toggle and then back thru the crimp bead. You can use a crimp tool to professionally flatten the crip, or just flatten with flat nose pliers. Attach the other end of your necklace to the other toggle piece in the same manner. Trim your loose end threads to about an inch long and singe slightly with a lighter to prevent fraying.  Crimping works better with the nylon thread because knots tend to slip. Cotton or waxed linen thread is suitable too, but not as durable.

If you want a 3 strand necklace like the examples shown, just repeat the process two more times and attach each strand to the same toggle.


This slideshow requires JavaScript.


embracing imperfection

Whale TaleThis one’s not for sale. I will wear it as a reminder… to embrace imperfection and go with the flow – swim with the tide. When I made it in Cynthia’s PMC class, I had a vision of a flat whale charm with swirlies on his back, and that is what I had… for a few minutes.

After it came out of the kiln, I broke his tail. I spent a few minutes with Cynthia talking about how to fix it, but Jill had a better idea. “Why not wire it back on so it can wiggle?” hmmmm. Not what I had in mind, but sooo much cooler than the original idea.
A bump in the road turned into an opportunity to make it better.

I am an anti-perfectionist. I grew up seeing first-hand that perfectionism can be a curse, so I went in the opposite direction.

In my classes, I try to take the pressure off of my students by teaching them to enjoy the process, not to focus on the final product. Embrace the journey, have fun, trust, create without a pre-conceived notion of what you want your art to look like. In this instance, I did not take my own advice. It took a few moments for me to give up my ‘whale vision’ but once I did, I was much more satisfied. When I look at it now, I don’t see a broken whale; I see innovation, collaboration and trust.

So… once again art lessons and life lessons are one. Trust the process and the Universe. Go with the flow. Let go of pre-conceived notions. Have fun. Everything will work out in the end.