
Embroidered & Layered Scarf Tutorial
Obsession is a strong word…. but I do tend to go a little overboard when I get hooked on a project. This scarf began as a little side project between other projects that were on hold. I was dying to get back to some embroidery and I thought a scarf might be something to pass the time until I could get back to stitching my next pair of jeans. I need to keep my hands busy — this did the trick in a big way! It is a great way to use up some of those hand dyed fabric scraps too!
Materials
1 scarf sized piece of gauzy or silky background fabric – mine is 10″ x 5′ hand dyed cotton gauze
Assorted scraps of cloth – hand dyed sheers, silks, cottons, organzas and cotton prints – this is the perfect opportunity to dig into your scrap or recycle bin!
Assorted floss – cotton, silk, DMC embroidery thread and embroidery needle
Instructions
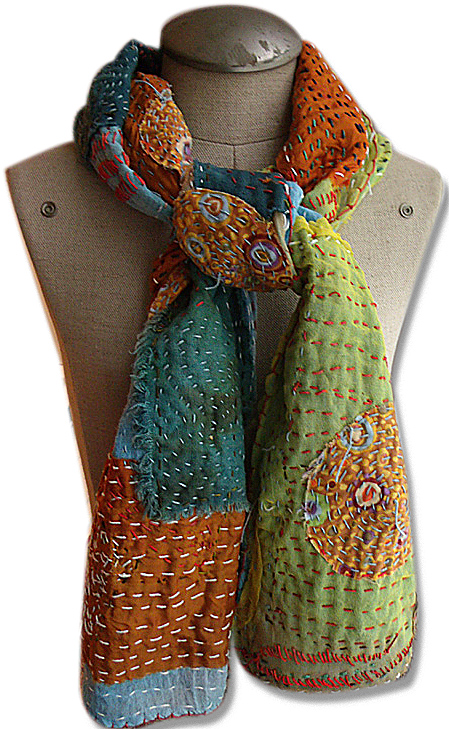
Decide on your finished scarf size. This one is about 10″ wide by 5 feet long but make it to suit your preference. Choose scraps in a combination of 3-4 colors.Trim your background fabric to size and start layering your scraps on top, overlapping pieces in an interesting composition. Tack down the layers on one side, then layer fabrics on the other side and tack them down as well. Use your sheer fabrics to their best advantage by layering them over prints and contrasting colors.
I added repetition by sewing on circles cut from store-bought printed fabrics. Repetition helps to give the piece a cohesive look and keeps it from looking like you just threw it together. I also repeated the same fabrics and thread colors throughout. This is important with this project, because it has such a bohemian, haphazard feel to it. Artsy is good, messy is not so good.
I did not put any batting or heavy fabrics in between the layers because I wanted it to have a soft, flowing, scrunchy feel to it. I wanted it to wrap easily around the neck without a lot of bulk. I also did not want to have to embroider through all those heavy layers.
When you have your fabric sandwich like you want it, pull out your needle and threads and start stitching. I left the knots exposed because i like the texture. I also like the random messy lines and rows and rows of running stitches. I did not do anything fancy — just put colorful stitches where i felt they would look good. On the circles, i started in the middle, radiating the stitching out to the outer rims.
The edges were finished with a blanket stitch. This really helped the piece look complete. I used red thread to give your eye a bold stopping point. Start to finish this piece took about a week to complete – mostly time spent in front of the TV. I have started on a creamy white scarf now and have added some photos of that into the gallery as well. Hand wash, hang to dry. Holler if you have any questions… Sandy
